The Wrong and the Right Way to Cover a Boat
I have a… glitch. A flaw in my psyche. I’m stupid. Well, not stupid. I’m poor. I will always default to the cheapest option. Then when that doesn’t work, I’ll go with the expensive option, which now would have been cheaper if I had just done that in the first place, instead of wasting money on the cheap option.
There is a leak in the boat. Probably multiple leaks. My current theory is that the seal around the deck drains aren’t set correctly. The deck drains get clogged. It rains. Water has nowhere to go. The water leaks around the deck drain and into the bilge.
I have since cut notches in the toerail so not nearly as much water is standing on the deck, but water is still getting into the bilge. Since this boat refit is going to take the rest of time, I figured it’s time to cover the boat. I still had the frame from when the boat was covered in the marina while we replaced the cabin walls. But rather than get the shrink wrap plastic, I went with a tarp.
 This tarp was like 40 feet by 50 feet, and cost $100. It was more than big enough. I took some cheap rope I had, and zigzagged that under the boat to hold the tarp in place. I even had a clever solution where the back flap was left hanging down so I could fit the ladder under it. Then I took some water bottles and added some hooks, to hold the flap down when not in use. It was genius.
And it lasted about a month.
The tarp just shredded. It’s not like there was something sharp that wore the tarp down. The tarp just gave up on it’s hopes and dreams. It was like a thousand angry wolverines tore it to shreds.
Or maybe it was the wind.
Anyway, the next year, it was time to do it correctly. The shrink wrap was only $180. I also got some vents for $15 and some zippers for $20.
 After watching a few YouTube videos, I had a pretty clear understanding of the process. You tie some ropes from up on the deck somewhere (like a stanchion) down to the water line and tie a loop. My stanchions are off the boat, so I tied them to the PVC poles of the frame. Then you run a rope all along the water line, through the loops of the first set of ropes. Like a belt. With suspenders.
Getting the plastic up onto the stupid thing was a bit of a hassle. Ian and I took over an hour getting it up there. Then he tucked the plastic around and under the belt, while I hit it with a heat gun, then I quickly pushed the two layers of plastic together so they’d melt into one. This took forever. Heat heat heat. Pat pat pat. Take a step to the left. Heat heat heat. Pat pat pat. Take a step to the left. Switch arms. Heat heat heat…
I did run into an issue where the PVC pipes started leaning backwards. But we had already shrunk the bottom of the plastic. So I ended up having to take each “rib” of the frame apart, trim them down, put it back together, then move to the next rib. It was a hassle and I snapped like 4 T connectors. But I’m glad I did it, because it looks a lot more stable.
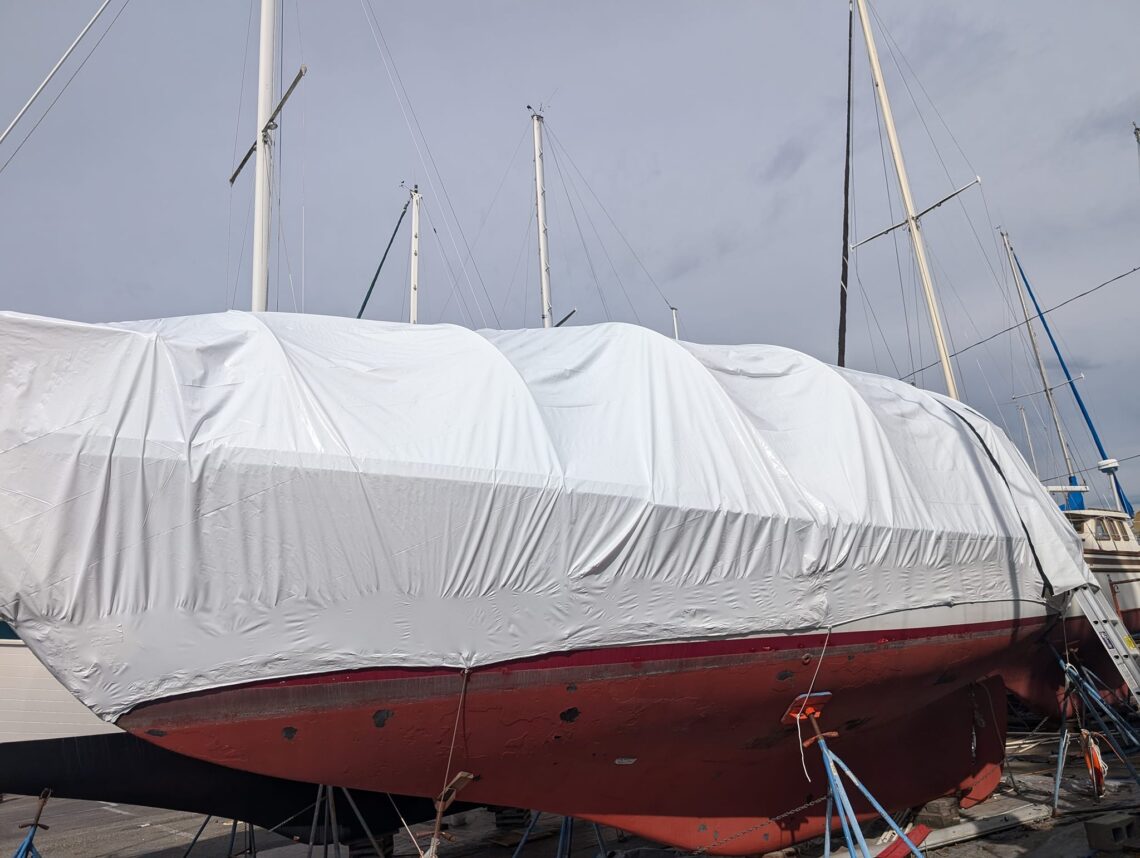
 Once that was done all the way around the boat, it’s time to shrink the plastic. Kellan, my fake mom, and I spent a couple of weekends working on it. It’s kind of mesmerizing to watch the plastic expand a little before shrinking.
The trick is to not let any one spot heat up too much. Keep the heat moving.
 There came a time, however, where this was just taking too long. The shrink wrap company sells a propane torch meant for this, but it’s like $500. I’m not going to spend that much on a one time tool. The idea is to leave this plastic up until I’m done with the interior and can finish the exterior of the boat. Then Ian suggested a miniature version from Harbor Freight.
That worked SOOOOO much faster. Like, 15 times faster. The only catch is that if you leave it in the same area too long, it melts. Not just melts. Catches on fire. Luckily, I had some shrink wrap tape, so it was an easy fix. Also, when plastic melts and turns into a liquid, it burns skin. Just putting it out there. Not like I experienced that or anything.


There was a section in the middle where I couldn’t reach it from the ground, and it was below the deck, so I couldn’t reach it from up above. I don’t think that will be a problem. Just looks incomplete.
 Lastly, Ian installed the zippers on either side of the ladder, so I can get up and down to continue the boat work.
Chris Dantes
My name is Chris. I currently live in Seattle, though I’m formerly from California. I'm a writer, comic, and superhero (allegedly). I complain. A lot. About everything. I also tell jokes.

One Comment
Jimi
Hi Chris… Im Jimi… I just wanted to ask you -would you say it was worth it to do the refit on this particular boat? How did it sail and is it a boat you would consider taking around the world? Would you do it again with this boat or find something different?
The reason I ask is cause I have the opportunity to get the same boat – same year… just wondering if this one is worth the effort or look for something else… thx